WPIndeed My Testimonials - Testimonials Management Plugin with built in templates - Documentation
Thank you for purchasing our plugin. If you have any questions that are beyond the scope of this help file, please visit the support form here. Thanks so much!
Files The What and Where
Documentaion Folder
This is the folder containing this documentation that you are now viewing. No Need to upload it, just keep handy for when you need to refer back to.
indeed-my-testimonials.zip
This is your Wordpress plugin file for WPIndeed My Testimonials that you add to your plugin directory of Wordpress.

Install Lets Begin
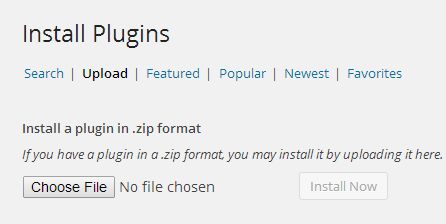
Uploading Theme
Inside your Wordpress admin area, go to Plugins at the top you'll see "Add New" click that and the click the link that says "Upload". In the upload box select the indeed-my-testimonials.zip file and click upload.
After uploading is completed and instalation is done Plugins > Installed Plugins and activate it.
Manage the testimonials
All Testimonials
Go to My Testimonials -> All Testimonials to see all the testimonials you added untill now. As a nice feature you can see the groups they are part of.

Add New Testimonial
If you know how to add a post or a page in WordPess you know how to add testimonials in your website. We have split this into 5 simple steps as you can see in the picture:
Client Name : This is self explanatory. Just add the name of your testimonial.
The Description : Add a few words that best describe your testimonial.
The Groups : Select what groups is this testimonial in. For your company a testimonials could be a department or a branch, you choose.
Client Information : We have structured the information about your testimonial's client in such a way as to include later into predefined premium templates, included in this plugin. The fields in this section are: Job, Company, Job URL, Company URL
Client Image : Select an image for your testimonial's client.
Rating : You can rate the testimonial with stars from 1 to 5.

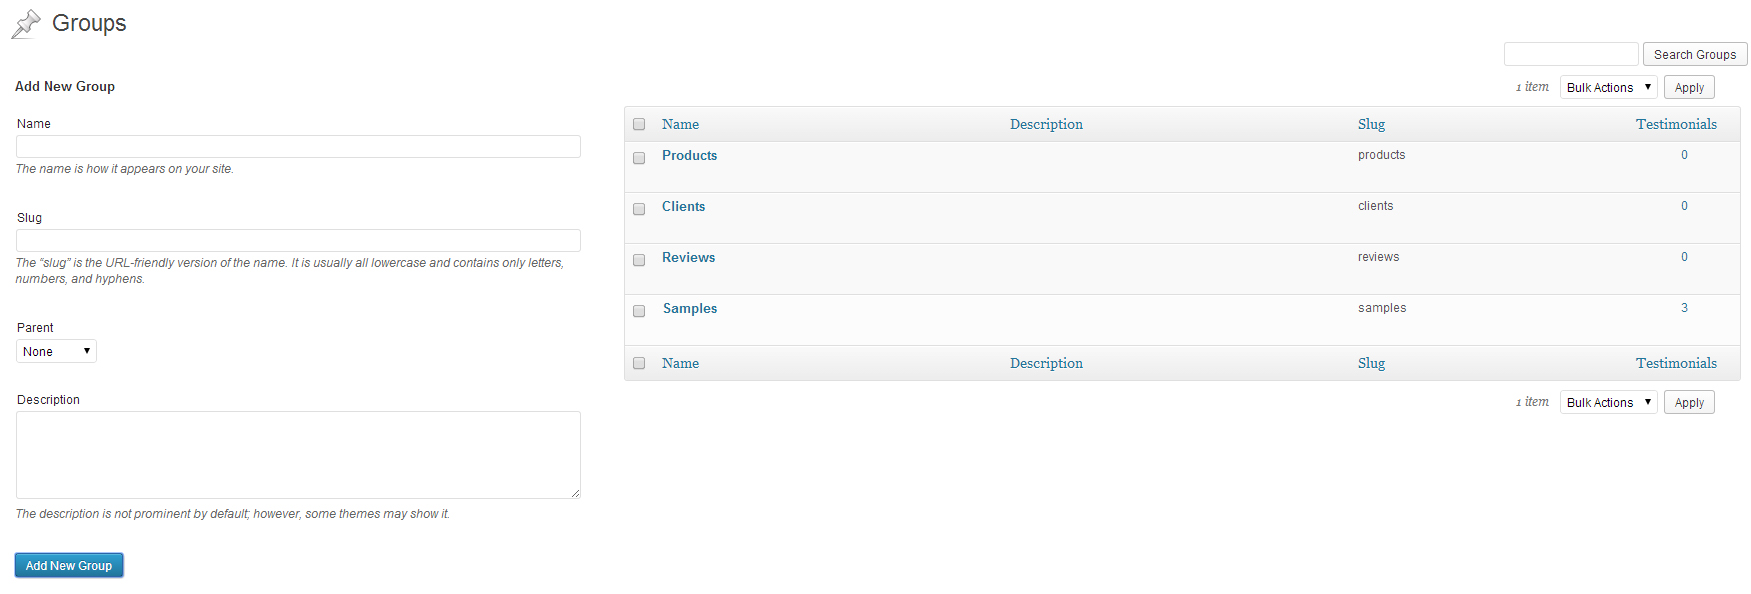
Groups
Managing the groups is the same as manageing the categories for your posts. You can add, edit and delete them.
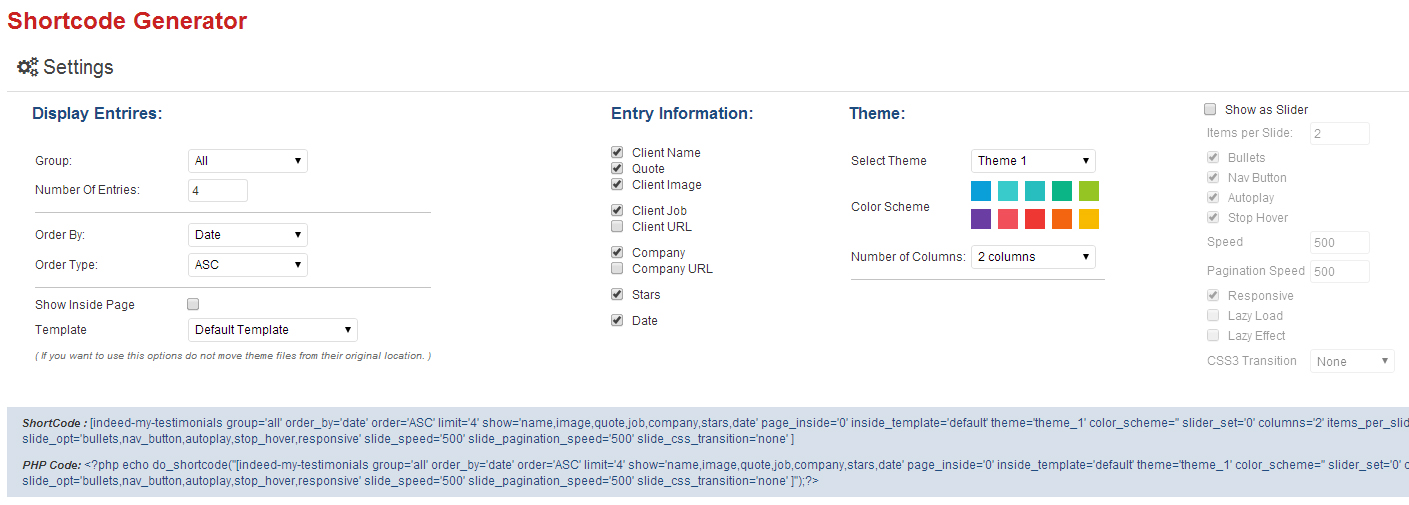
Shortcode Generator
The shorcode generator is a click only, instant preview tool. We have split the options in 4 columns:
Display Entries In this section you can choose what information will be displayed: What groups, how many testimonials, ordering options and you can choose if you want to open a page for each testimonial.
Entry Information With a single checkbox you can choose to display each type of information added about the testimonials in the Add New Testimonial section.
Theme This is where the NO CODING REQUIRED comes to live. With a simple mouse click you can choose between the 10 included templates and for each template you can go through 10 color schemes and you can choose on how many columns will your testimonials be displayed.
Show in Slider You can choose to transform this list into an animated slider with 11 options, including CSS3 transitions.
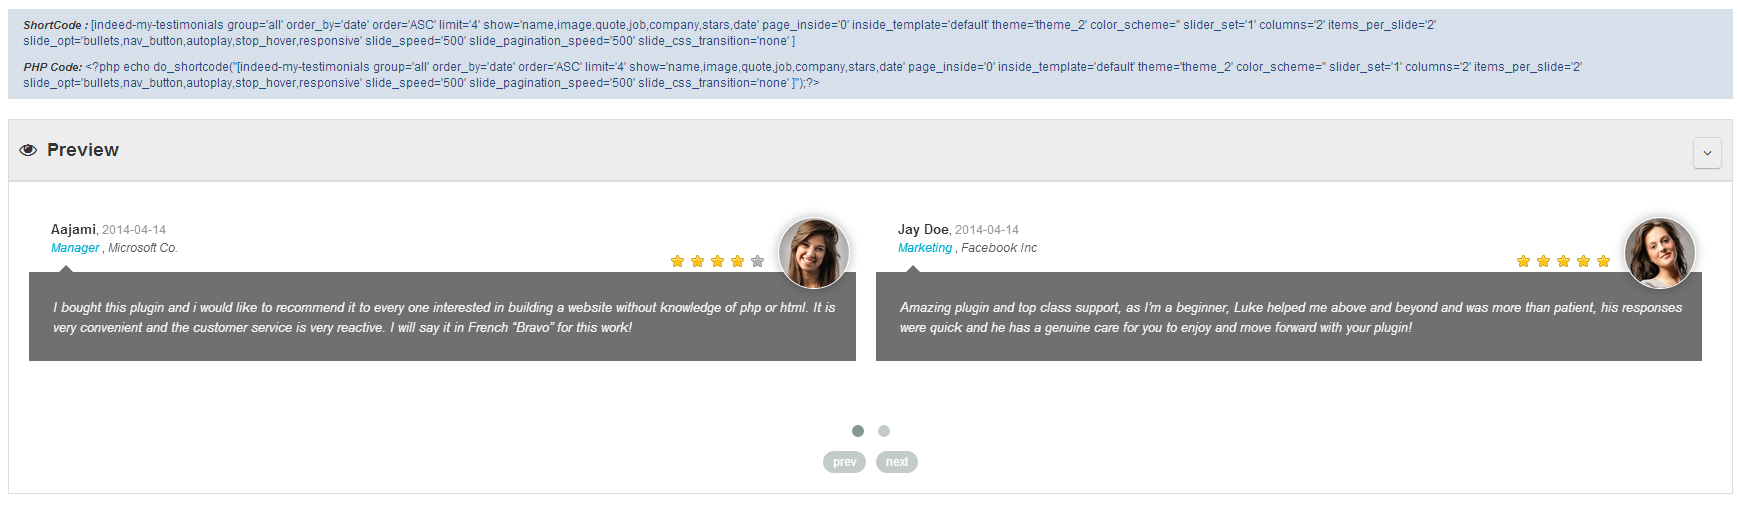
Preview Every single change you make in the shortcode generator will give you an instant result in the preveiw section. NO PAGE REFRESH REQUIRED
Form Builder
The form builder is a click only, instant preview tool to create your own frontend form but testimonial subbmission.
"Show" Column: Check which field do you wanna be available into the form
"Label" Column: Set the custom label on each field. If the field is blank, a blank label it will be displayed.
"Required" Column: Check which field should be required in order to submit the testimonials.
The submitted testimonial will be set with status "Pending" and it will not be displayed into the front-end before you will not change the current status to "Publish"
Preview Every single change you make in the form builder will give you an instant result in the preveiw section. NO PAGE REFRESH REQUIRED


Thanks again for buying this plugin, if you need any help/support at all contact us.